


Content
- 1 Verify the existing deck can support enclosure loads
- 2 Choose the enclosure type that matches your goals and budget
- 3 Permits, code triggers, and moisture control you should plan for
- 4 Build sequence: foundations, walls, and roof (step-by-step)
- 5 Detailing screens, windows, and airflow so the space is comfortable
- 6 Final inspection checklist and long-term maintenance
To enclose a deck correctly, treat it like a small home addition: confirm the deck can carry the added weight, then build code-compliant walls and a roof with proper flashing and drainage. If the existing deck isn’t engineered for enclosure loads, the safest approach is adding new footings/posts (or rebuilding the deck structure) so the enclosure is supported independently.
This guide focuses on practical, buildable steps for turning an open deck into a screened room, 3-season space, or fully conditioned sunroom—without guessing on structure, moisture, or permits.
Verify the existing deck can support enclosure loads
An enclosure adds weight (dead load) and wind uplift forces the original deck may not have been designed to resist. Even if the deck feels “solid,” the weak points are often the footings, connections to the house, and lateral bracing. A simple but reliable workflow is: identify what you have, estimate new loads, and upgrade the structure before installing walls.
What to check before you buy materials
- Footings: size, depth below frost line (if applicable), and condition (no heaving or settlement).
- Posts/columns: species/size (commonly 4x4 is often insufficient for tall enclosures; 6x6 is typical for stability), rot at bases, and hardware (post bases, caps).
- Ledger connection (if attached): proper flashing, through-bolts/lag screws at correct spacing, and no water damage on the house rim joist.
- Beams/joists: span and spacing consistent with your decking type and expected occupancy (a crowded room is more load than a lightly used deck).
- Lateral bracing: knee braces, hold-downs, or engineered connectors to resist sway and wind.
A practical rule: if you’re planning a roof (especially with shingles) or insulated walls/windows, assume you’ll need new posts/footings or an engineered retrofit. When in doubt, support the enclosure on new foundations rather than relying on a deck built for light exterior use.
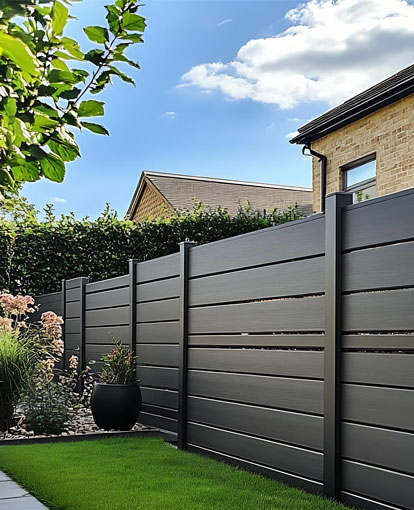
Choose the enclosure type that matches your goals and budget
Your enclosure choice determines structure, cost, and code requirements. A screened enclosure is mainly about insects and shade; a 3-season room adds weather protection; a sunroom becomes part of the home envelope with insulation, windows, and HVAC implications.
| Enclosure type | Best for | Typical roof/wall build | Common installed range |
|---|---|---|---|
| Screened-in room | Bugs, airflow, shade | Light framing + screen panels; roof optional | ~$25–$60 per sq ft |
| 3-season room | Rain/wind protection, spring/fall use | Framed walls + vinyl/glass windows; insulated roof sometimes | ~$60–$150 per sq ft |
| 4-season sunroom | Year-round living space feel | Insulated walls/roof, high-performance windows, HVAC plan | ~$150–$350 per sq ft |
If your main goal is comfort without turning it into “house space,” a 3-season approach often hits the sweet spot: weather protection and cleaner furniture without the full cost/complexity of insulation and HVAC.
Permits, code triggers, and moisture control you should plan for
Deck enclosures commonly trigger building permits because you’re adding walls/roof, changing egress, and increasing loads. Electrical permits are typical if you add outlets, lighting, or fans. For conditioned spaces, energy code requirements (insulation, window performance, air sealing) often apply.
A practical pre-permit checklist
- Sketch plan + dimensions, roof pitch, and how the roof ties into the house.
- Footing layout and sizes; post and beam sizes; lateral bracing approach.
- Window/door sizes and swings; any required safety glazing near floors/doors.
- Drainage plan: gutters/downspouts and where roof water will discharge.
- Ventilation strategy: screened airflow, operable windows, or mechanical ventilation.
Moisture is the most common failure mode. Flashing and water management matter as much as framing. Plan continuous flashing where the new roof meets the house, and keep wood ends and fasteners out of standing water with proper clearances and drip edges.
Build sequence: foundations, walls, and roof (step-by-step)
The cleanest builds follow a simple order: support first, then square walls, then dry-in the roof, then infill with screens/windows. If you’re enclosing an existing deck, you may need to temporarily remove railings and some decking boards to access framing and add hardware.
- Confirm the deck is level and square enough to frame on; correct major out-of-square issues now (shimming after walls are up is painful).
- Add new footings and posts if the enclosure will carry a roof or heavy glazing; install post bases and caps with corrosion-rated hardware.
- Install a beam (or beams) designed for the enclosure roof loads; ensure lateral bracing/hold-downs are in place to prevent racking.
- Frame walls: bottom plates anchored to structure, studs at typical spacing (often 16 inches on center), double top plates where required.
- Frame openings for doors/windows with proper headers; keep openings plumb and sized to manufacturer rough opening specs.
- Install roof framing (rafters or a shed roof): set slope for your roofing material and climate; add blocking and hurricane ties where required.
- Dry-in the roof: sheathing, underlayment, flashing at the house, then roofing; add gutters if water will hit walkways or erode soil.
- Install sheathing or exterior skin (if any), then screen panels or windows; keep fasteners and trim compatible with treated lumber.
- Finish interior surfaces and flooring transitions; add electrical (GFCI protection), lighting, and ventilation as planned.
If you’re unsure about header sizes, roof ties, or uplift connectors, that’s the right moment to consult a local structural professional. One correct detail can prevent cracked glass, sticky doors, or wind-related damage later.
Detailing screens, windows, and airflow so the space is comfortable
Comfort comes from two things: controlling water/air leaks and managing heat. Screened rooms excel at airflow, while windowed rooms need operable windows and shading. Think about where breezes come from and where you want them to exit; cross-ventilation often matters more than the number of windows.
Practical comfort upgrades that don’t overcomplicate the build
- Choose darker, tighter weave screen where glare and tiny insects are an issue; choose stronger mesh where pets push on panels.
- Add a ceiling fan rated for damp locations; it improves comfort even in mild weather.
- Use kick plates and removable screen panels in high-traffic bays to simplify repairs.
- For windowed rooms, plan shading (blinds or exterior shades) to reduce overheating on sunny exposures.
For 4-season rooms, the envelope must be consistent: insulation without air sealing still leaks comfort, and tight air sealing without ventilation can trap humidity. Pick a clear “season target” and build to that standard instead of mixing systems halfway.
Final inspection checklist and long-term maintenance
Before you call it done, walk the build like an inspector: structure, water, then safety. Small errors—like missing flashing laps or loose screen spline—become big annoyances after one rainy season.
Closeout checklist you can use today
- All posts are plumb, hardware is tight, and connectors are corrosion-rated for exterior use.
- Roof-to-house flashing is layered correctly, sealed where required, and directs water onto the roof surface—not behind it.
- Gutters/downspouts discharge water away from footings; no splashback onto posts or siding.
- Doors operate smoothly with consistent reveals; windows latch and seal evenly.
- Electrical outlets are GFCI-protected; fixtures are rated for damp/wet locations as applicable.
Maintenance is simple: inspect caulk lines annually, clean screens/windows seasonally, and re-check fasteners after the first major temperature swing. That first year movement is normal; catching it early keeps the enclosure tight and quiet.